Complete Guide To Managing Bills In QuickBooks Online
Table of Contents:
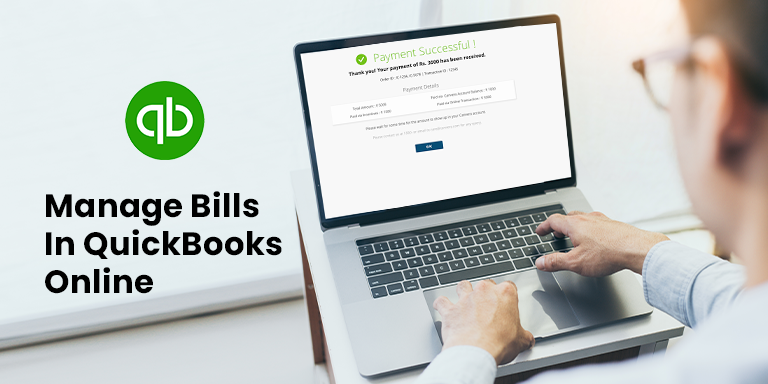
If you are wondering how to manage the bill in QuickBooks Online. Then, this article might help you with your confusion. QuickBooks Online is a fundamental key to running a successful small business. It leads to the proper management of cash flow. Plus, it helps owners to evaluate the overall financial performance of their ventures. Meanwhile, it’s a fact that most small business owners and self-employed entrepreneurs find the task of managing bills complex and time-consuming.
For more clarity, we have made a complete guide to managing the bills in QuickBooks Online. Just be sure to read the article till the end.
You may also like: A Comprehensive Guide on QuickBooks Online that You Must Read in 2022
How to Manage the Bills in QuickBooks Online?
To use QuickBooks effectively, you must set up several records of the cash amount utilized. You can make several cost accounts as much as you require. Here is the well-ordered technique on the most skillful method to enter bills into QuickBooks Online (QBO).
Methods are listed below:
Methods for Managing Bills in QuickBooks Online
- Receive the bill and enter it in QuickBooks.
- Enter a Partial or Full Payment.
- Set Reminders for Payment of Future Bills.
- Review the Suppliers’ accounts.
1. Receive the Bill and Enter it in QuickBooks
As far as entering accounts payable in QB, all you need to do is:
- Click Suppliers and choose Enter Bills
- Click Enter Bills have been given below the Supplier title.
- From the drop-down menu, select Supplier.
- Choose Terms as well as Bill Date and Due Date.
- Enter the expense account or choose it from the drop-down menu.
- Provide a Concise Description of the bill.
- Enter the specific amount along with the accompanying tax rate.
- Select the Save option and Close.
2. Enter a Partial or Full Payment
In certain instances, you may not have enough money to pay your bills immediately. To avoid financial crises, you can make partial payments if possible.
Several options are available to make a payment for your bill :
The first and foremost option is to make payments directly from the suppliers/vendors page. Here is the list of steps that you have to follow.
- Click Suppliers.
- Click Pay Bills, At the top of the supplier’s page, two options allow you to filter the bills for making payments on QuickBooks Bill Pay.
- You can check or click on the supplier’s bill for which you want to make payment.
- QuickBooks will automatically display information such as the invoice number, supplier’s name, terms, and the due amount of the particular bill.
- Enter the amount to pay.
- Select the account from which you want to make payment.
- Click on Pay Selected Bills, Save, and Close.
QB completes the Bill Payment form immediately for you by filling in the areas listed below:
- The supplier name (Payee).
- Account: This will default to the primary version you set up in QuickBooks. In case you have multiple accounts, you can choose the particular accounts from the drop-down menu from which the payment will be made.
- Ref. no.: The application assigns the following check number in the Ref. no. column.
- Amounts: By default, the application assumes that the payment being made is full. If you are planning to make a partial payment, then you can enter a different amount.
- Outstanding Transactions: QuickBooks list the unpaid pending bills for some suppliers. If you want to make payments only for some particular bills, the box to the left of each itemized bill allows you to select or deselect that item.
3. Set Reminders for Payment of Future Bills
- Click on the Edit menu.
- Click Preferences that are given below the edit menu and a new window will open.
- Click on the Reminders under the Preferences option.
- Under my preferences menu, check the box “show reminder list when opening a company file.”
- Click on the company preferences menu and set the Bills to Pay. Check the appropriate button for you and enter the number of days to get the reminder from QuickBooks.
- Click OK. You will be reminded about unpaid and overdue bills as soon as this setup gets completed.
- Also, you can click on Reminders and Alerts to view the current reminders on QB’s home page.
4. Review the Suppliers’ accounts
- Click on Reports.
- Select suppliers or vendors and payables.
- You will get various vital reports that can help you manage your business.
A/P Aging Detail: The A/P Aging Detail Report displays the entire invoices you have obtained from suppliers as well as the exact amount to each supplier.
A/P Aging Summary: The A/P Aging Summary Report shows the amount of money you owe to each supplier.
Bill date: Denotes the date on which the particular bill came into effect.
Due date: Denotes the date on which payment should have been made to the supplier.
A/P Graph: This graph shows the Account Payable Aging Summary Report in the form of a pie chart.
Supplier Balance Detail: It highlights what transaction(s) make up your current balance with each supplier.
Suppliers Balances Summary: It highlights the current balance of your business with each supplier.
Pending Bills Detail: It highlights how much you owe each supplier and whether any invoices are past due or not.
Transaction List by Supplier: It shows the number of transactions you have with each of your suppliers.
Expert Opinion!
You are now ready to use QuickBooks Online to pay your invoices. Not only will you save time, but you will also be able to identify expenses that need to be cut or eliminated. If you have any other questions regarding QuickBooks desktop, QuickBooks Online, or hosting QuickBooks in the cloud, then feel free to ask in the comments.
If you are satisfied with the software and want to purchase it from the best solution provider, feel free to contact us. We are an Intuit authorized QuickBooks Solutions Provider to selling genuine Intuit products. You can also avail the expert consultations on which Intuit versions fit best your business needs. Our services are held to the greatest possible standards for the benefit of our customers.
FAQ’s
How Do You Bulk Delete Bills in QuickBooks Online?
In order to delete bills on a multiple or a bulk basis, you need to :
- Proceed towards the sales menu and then choose or click on the tab for invoices.
- This will allow you to view the list of invoices and then select the ones you want to delete ( For invoice selection, you need to click on the column boxes).
- Click the Batch actions button.
- Select Delete.
Is it Possible to Stop Bills/Invoices Syncing from QuickBooks Online?
Transactions are synced two ways by default. For only Bill.com to QuickBooks Online sync, please contact Customer Support.
Does QuickBooks Online not Sync my Payments to Bill.com?
Syncing payments between Bill.com and QuickBooks Online is only possible in one direction by default. If you don’t enable the option to sync 2-ways in the sync preferences, then QuickBooks Online payments won’t sync to Bill.com.
- Select Settings
- Choose your Preferences under Sync
- Select edit icon
- Choose Enable 2-Way Payment Sync
- Select Save
Is QuickBooks Online Able to Display my Bill Documents?
QuickBooks Online and Bill.com do not sync documents. These documents should be uploaded to your Bill.com inbox and linked to the bills.
How do Bills Work in QuickBooks?
From within QuickBooks, you can use your bank account, debit card, or credit card to settle up with vendors. Your choice of ACH or cheque for your vendors’ payment is at your discretion. Your invoices will be marked as paid in QuickBooks once scheduled. No one else will inadvertently hand them money down the line.
How do I Clean Up a Bill in QuickBooks?
It’s possible to erase the charge without even seeing the bill by accessing it through the Expenses page:
- Select Expenses from the list of Transactions or navigate directly to Expenses.
- Find the unwanted charge and remove it.
- Choose Delete from the drop-down menu in the Action column.
How to Pay Bills in QuickBooks Online?
You can pay your bills by following the steps mentioned below:
- First step: Log into your QuickBooks Online Account.
- Second step: Select + New.
- Third step: Select Pay Bills Online.
- Fourth step: Choose the invoices you wish to pay by marking their checkboxes and then click Next.
- Fifth step: Check out how to pay. Click Edit details if you need to make any changes.
Note: The Memo field will only be on checks that are written on paper.
- Sixth step: Click “Submit payment” to send in your payments on time.
How to Pay Multiple Bills in QuickBooks Online?
With the Pay Bills feature, you can settle outstanding invoices with many service providers at once. To facilitate this process, checkboxes are provided next to each transaction.
Just follow these steps:
- In the top left, select the “+ New” option.
- Expenses can be paid by clicking on Vendors, then Pay Bills.
- Mark the boxes next to the bills from different vendors that you intend to pay.
- To save and close, click Save.
How to Write Off a Bill in QuickBooks?
You can delete or remove a bill by following the instructions given below:
- To Delete or Write off an invoice, Click Accountant Tools.
- To locate the appropriate invoice, use the following filters: Age, To Date, and Balance less than. Click on Invoices & Payments, then Invoice Search.
- Please check the name in the “Customer” section.
- Select the boxes next to each bill you wish to delete.
- Choose to Discard and Write off.
- Choose the account you use to store uncollectible debts from the Account menu.
- Put in your password and hit the Apply button.
How to View Bills in QuickBooks Online?
In order to view your bills on QuickBooks Online account users should follow the steps:
- To start, log into your QuickBooks Online account.
- For viewing your expenditures, either click the “Transactions” tab under “Bookkeeping” and then “Expenses”.
- To access the settings menu, click the gear icon in the upper right corner of the table.
- A set of column titles will appear. Check the box labeled Source.
- Bill Pay will be listed in the Source column for any payments made through Bill Pay.
 written by
About Author


