 Sage . Jan 13th 2025 . 7 Min read
How to Download and Install Sage 50 Accounting in 2025?
Discover the power of Sage 50 download, a robust accounting solution catering to diverse business needs. With its seamless download, access tools for efficient financial management, invoicing, payroll, and reporting. Enhance operations and gain precise insights for your business’s success.
Downloading and installing Sage 50 Accounting is a straightforward process, but it’s important to follow the right steps for your specific version and needs.
Minimum System Requirements to Download Sage 50
| Component | Requirement |
| Processor | 2.0 GHz |
| RAM | 8 GB |
| Operating System | Windows 10 (21H1 or higher) or Windows 11 with latest updates |
| Disk Space | 1 GB for installation |
| Browsers | Microsoft Edge (required for Sage Payroll & Payments); Google Chrome and Microsoft Edge (2020 or higher) for other Connected Services |
| .NET Framework | Microsoft® .NET Framework 4.8 with additional 280 MB to 850 MB |
| Display | SVGA video with minimum resolution 1280×800; Preferred 1440×900 or higher |
| Internet Access | Required for online features; 25 Mbps download, 10 Mbps upload recommended |
| File Size | Maximum 5GB for Sage Remote Data Access companies |
| Computer Name | 15 characters or less |
| Excel, Outlook, Word | Microsoft Office 32-bit versions 2016, 2019, 2021 |
| Microsoft 365 | Business Basic, Standard, Premium, or Enterprise Editions |
| Printers | Supported by Windows 10 or 11 |
| PDF Viewing | Adobe® Reader Acrobat |
Steps to Download Sage 50
Step 1: Go to the Sage 50 download portal: http://support1.na.sage.com/selfservice/.
Step 2: Choose your product from the given list if you cannot find your product then click on see more products.

Step 3: Choose Sage 50 (United States) Product and Select your version and edition click on Sage 50—U.S. Edition: Download Portal.
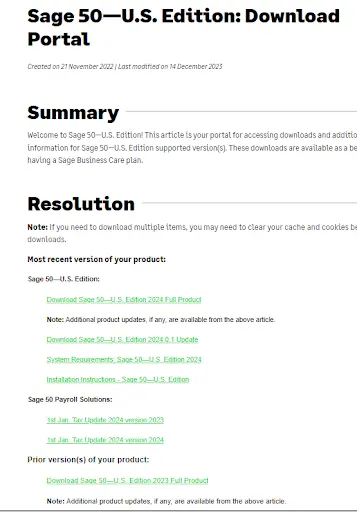
Step 4: Click the “Download” button and the file will be a .exe file, typically named “Sage50.exe“.
Step 5: Save the file in your Desktop or Downloads folder for easy access.
Installation Steps for Sage 50 Accounting
- Double-click on the Sage50.exe file to initiate the installation process.
- Browse for the Destination folder and click Install after reviewing the Requirements in the Install Shield Wizard prompt.
- Before proceeding, turn off your anti-virus software. Click Next after reviewing the installation instructions.
- Read the License Agreement, check the box to agree, and click Next.
- In the window, tick the box for Auto Configure the Windows Firewall and click Next.
6. Enter the Serial Number from your order or download notification (Figure 1.6) and proceed by clicking Next.
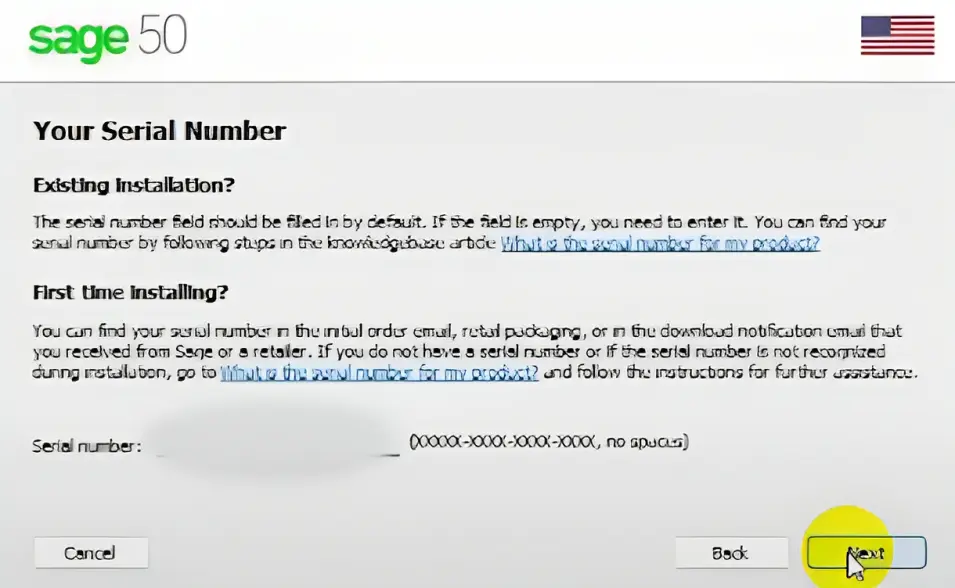
7. Select No and click Next.

8. Select this computer is the server option and then click next.
9. Choose the installation options for file locations and click Install.

10. The installation will commence.

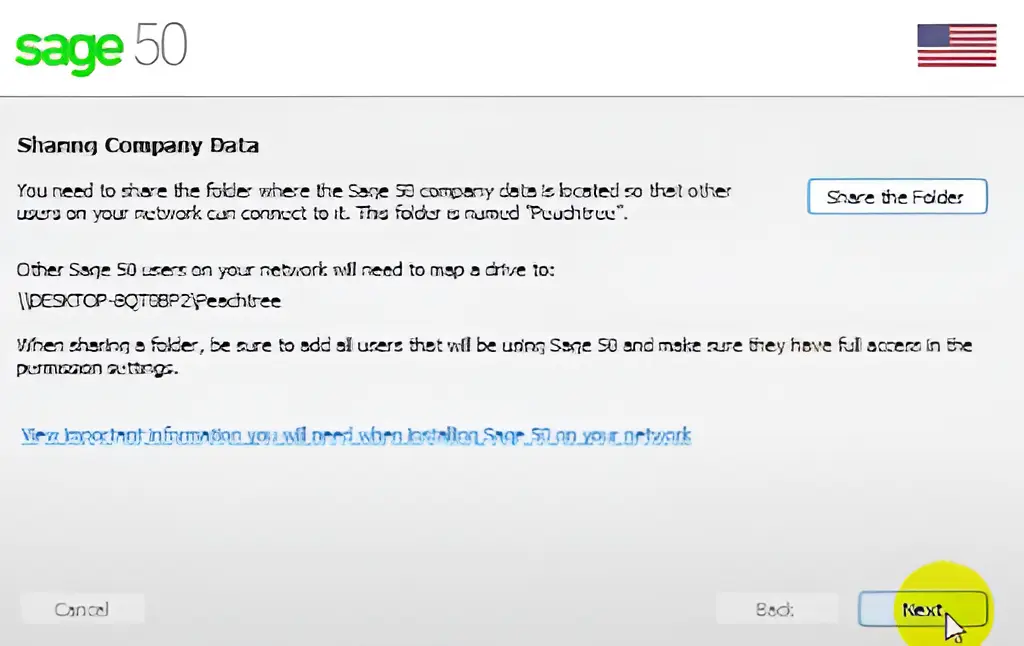
11. Click Next on sharing company data.
12. Select Company File option and then click next.
13. Installation completed.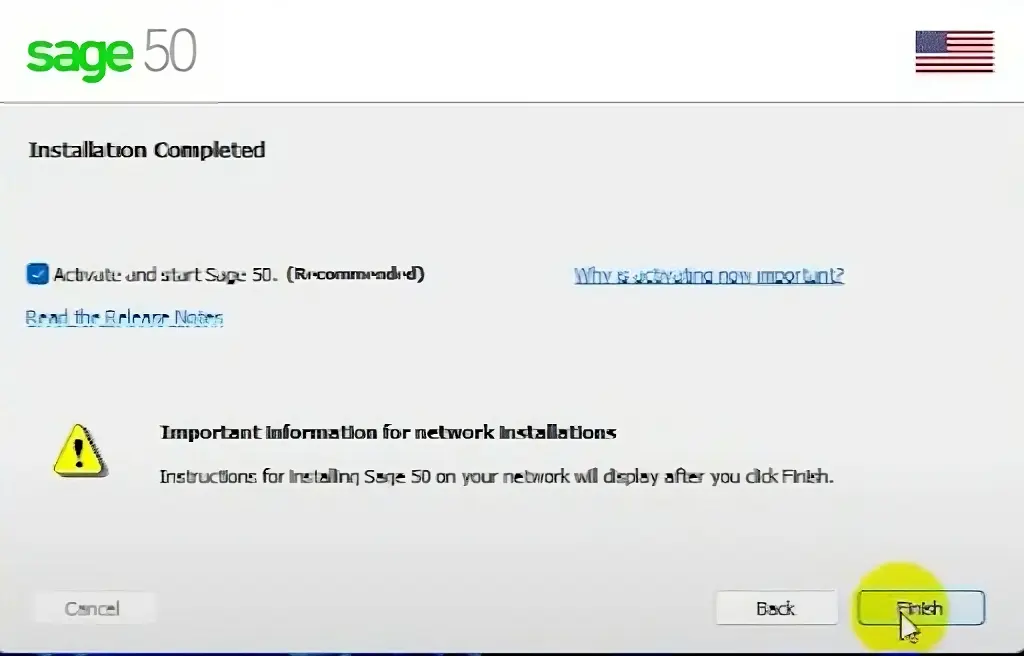
14. Open Sage 50 from the desktop.
15. Click on Help, and select Sage 50 Activation, Licensing, and Subscription Options from the dropdown.
16. Click Activate Online Now.
17. Once activated, click OK.
18. Sage 50 is now activated. Restart your system and start using Sage 50.
Additional steps
- Activate your software: Once installed, launch Sage 50 and follow the activation prompts. You’ll need your license key again for this step.
- Download any updates: Sage releases regular updates to fix bugs and improve performance. Check for updates in the Help menu within Sage 50.
- Set up your company data: Create a new company file or import an existing one. You’ll find these options in the File menu.
Key Points to Remember
- Downloading and installing Sage 50 from a trusted source like the official Sage website is crucial to ensure software integrity and security.
- Always have your license key handy during the installation and activation process.
- If you encounter any issues during the download or installation, refer to the Sage 50 knowledge base or contact Sage support for assistance.
Conclusion
Installing Sage 50 Accounting is a simple process when following these steps meticulously. It begins with meeting the minimum system requirements, accessing the official download portal, and saving the installer file. Installation involves a series of prompts, including reviewing requirements, agreeing to the license terms, and entering your serial number. Activation, updating, and setting up your company data follow the installation, ensuring a smooth start to using Sage 50.
Read also: How to install the Sage 50 Accounting
How to Download and Install Sage 50?
FAQ’s
Is there a free version of Sage 50?
While Sage 50 doesn’t offer a permanent free version, you can get a 7-day free trial to test all its features. This lets you explore its capabilities before committing. Remember, the trial expires and requires subscribing for continued use. Free alternatives exist but might lack the advanced features and functionalities of Sage 50. Weigh your needs and budget to determine the best fit for your accounting software needs.
Is Sage 50 being discontinued?
Yes, Sage 50 desktop support ended in September 2022. While existing users can still access their data, no new licenses are sold and no updates are provided. Sage is focusing on their cloud-based versions like Sage 50cloud Accounts.
Is Sage 50 the same as Simply Accounting?
No, Sage 50 and Simply Accounting aren’t the same. Sage 50 is the current name for the accounting software formerly known as Simply Accounting. In 2012, Sage rebranded their entire product line with a numbering system, making Simply Accounting become Sage 50. So, they’re essentially the same software, just under a different name.
How do I get Sage 50 on my new computer?
Download Sage 50 from the official site: http://support1.na.sage.com/selfservice/. Choose your version and edition. Save the installer (.exe named Sage50.exe) to your computer. Double-click to install. Turn off anti-virus software during installation. Enter your license key when prompted. Activate online in Sage 50 later. Download updates and set up your company data. Done! Remember to back up your old data before transferring it to your new computer.


