 Windows Server . Jul 10th 2024 . 7 Min read
How to Access Local Drive Files Remote Desktop
Nowadays, access local drive files through a remote desktop connection is an essential skill for many professionals. Whether you’re working from home, traveling, or managing a network of computers, this capability can greatly enhance your productivity and flexibility. This guide will walk you through the straightforward steps needed to access your local drive files from a remote desktop session, ensuring you can seamlessly work with your data no matter where you are.
Steps to Access Local Drive Files from Remote Desktop Session
Step 1. Launch Remote Desktop Connection.
Step 2. Click on “Show Options” to expand the settings.

Step 3. Go to the “Local Resources” tab.
Step 4. Click the “More” button under “Local devices and resources”.

Step 5. A new window titled “Remote Desktop Connection” will appear.
Step 6. Expand the “Drives” section by Clicking on “+”.

You can choose to: Select specific drives to map by checking their boxes.
Check the “Connect to all drives” box to access all local drives.
Step 7. After Tick the Box Click “OK” then Back to Click on “General”
Step 8. Enter the remote details, and click Connect.

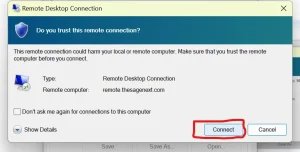
Step 9. Then a popup window Open Click on the “Connect” button.

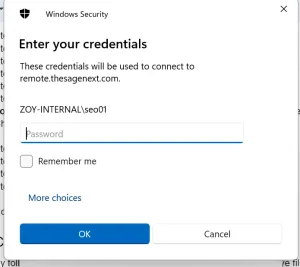
Step 10. Enter your Username and Password.

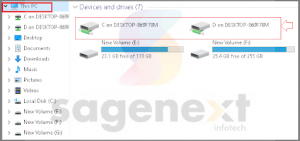
Now, let’s Connect and see how it works out.

Also Read: How to Change RDP Port Number for a Windows Server?
Conclusion
By following these simple steps, you can easily access your local drive files from a remote desktop session, enabling you to work more efficiently and maintain access to your important documents and applications. This not only boosts your productivity but also ensures that you have the flexibility to manage your work from any location. With remote desktop access becoming increasingly vital in today’s interconnected world, mastering this skill is more important than ever.


